DIY Korean hair bow
DIY Korean hair bow

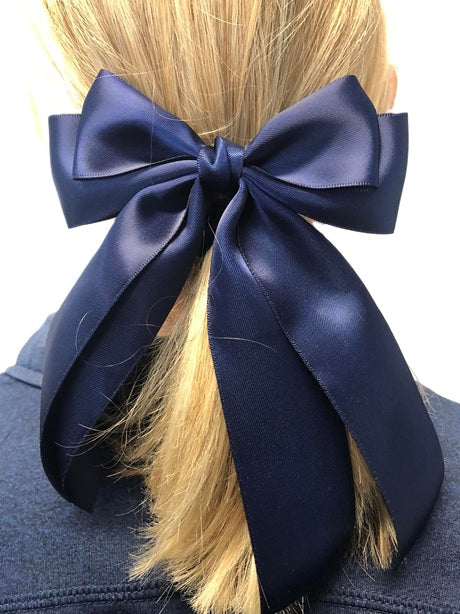
How to make this easy Korean ribbon hair bow. You could also call this bow a double bow tie bow with tails.
I will start by showing you how to make a bow tie with ribbon.

This is a little bow tie. I used 38mm double sided satin ribbon cut to 12cm.
Seal the ribbon ends. I like to use a lighter it's quick and easy. Just put the flame close to the ribbon it will heat and melt the ribbon edge sealing it.
Fold the ribbon in half and mark the center with a pin. You don't have to use the pin. You can just fold the ribbon in half and pinch the edge of the ribbon so it makes a mark. You can use this mark as your centre.
Fold the ribbon over so the edge sits about half a centimeter over the centre mark. Your crease or pin. Repeat with the other side.
Same as photo below.

Take a threaded needle and feed it through the front centre line. You want to create even peaks and valleys.

Gather the ribbon as you pull the needle through. Hold the ribbon with the gather and push your needle all the way through and push the needle back through the bow from the other side.
 You can now tie off and knot your thread. You now have a bow tie bow. You can finish off the centre of the bow how you like.
Now create your Korean ribbon bow. You will need two bow tie bows and your tails.
For this bow I used 38mm double sided satin ribbon. Cut the ribbon to
1 length 21cm
1 length 25cm
2 lengths 29cm
1 length 3cm

We will use the 21cm and 25cm lengths for our bow. The 29cm lengths are for the tails and the 3cm length for the centre.
Take your 21cm length and fold in half to make the centre. Pinch the centre fold to make the centre.

Or you can put a pin in to mark the centre.

Fold the ribbon end over the centre line by about half a centimeter.

I put the pin so you can see the centre.
 Repeat the with the 25cm length of ribbon. Once you have 2 done, sit the smaller one on top with the fronts facing up. Line up your centre mark of both bows. However, you want the smaller bow to sit higher up than the longer bow.
 Once you are happy with your placement of the ribbons take your needle and thread and feed your needle through the ribbons. I find it helpful to use a hair clip to hold the ribbons in place. Feed the needle through the edge of your ribbon from the front and come out the front edge on the other side.
Pull your needle through gathering the ribbon as you go.

Once you have gathered your ribbon tight wrap your thread around your bow and push the needle back through the other side.

You now have your bow for your Korean bow you just need your tails.

Take your 29cm lengths of ribbon fold them in half and mark the centre of each length of ribbon.
 Sit your ribbon on top each other lining up your centre fold. I put about a 1.5cm gap between the ribbon edge.
Place a hair clip to hold the ribbons in place. If find it easier to take out the pins when pushing the needle through.

Push your needle through the top of the ribbon like you did with your bow. Create your valleys and peaks with the needle coming out through the top edge of the ribbon. See photo.

Pull your needle through and gather your ribbon as you go.

Pull your gather tight and wrap your thread around the bow and push the needle through the other side. Tie off your thread.

Push your needle through the bottom centre of your tails and up through the bottom centre of your bow. Don't push the needle all the way through. First check how your tails and bow are sitting and adjust as needed. Make sure the top your your tails ribbon is sitting under the bottom of your bow.

Once you are happy with placement push your needle through and pull tight wrap your thread around both the bow and tails and push the needle back through the other side.

Tie off your thread and you are now ready for your centre.

Take your 3cm length of ribbon fold the ribbon so the edge meets the centre folds. With a lighter melt the ribbon edge and pinch together.

Repeat with the other side.

You will now have this buckled length of ribbon.

Glue one edge to the back of your bow centre wrap it around your bow and glue the other side to the back of your bow.

Searching for satin ribbon in Australia shop our store for a huge range of both colours and widths.
